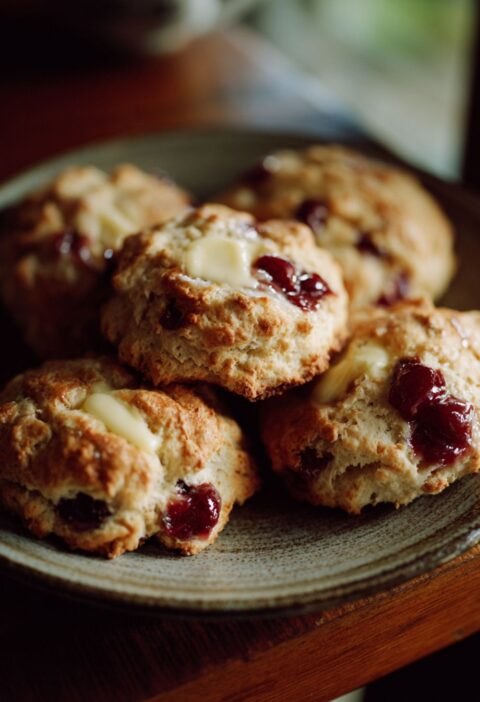
This Mary Berry Plain Scones Recipe is a light and fluffy recipe, which is made with self-raising flour and cold butter. It’s a classic, foolproof recipe, ready in about 30 minutes.
Mary Berry Plain Scones Recipe Ingredients
- 450g (1 lb) self-raising flour, plus extra for dusting
- 2 level tsp baking powder
- 100g (3 ½ oz) cold butter, cut into small cubes
- 50g (1 ¾ oz) caster sugar
- 2 large eggs
- A little milk (about 4-5 tbsp)
How To Make Mary Berry Plain Scones
- Prep the oven and dry ingredients: Preheat the oven to 220°C (200°C Fan/Gas Mark 7). Lightly grease two baking trays. In a large bowl, sift together the self-raising flour and baking powder.
- Rub in the butter: Add the cold, cubed butter to the flour. Using your fingertips, quickly rub the butter into the flour until the mixture resembles fine breadcrumbs. Stir in the caster sugar.
- Combine the wet ingredients: Crack the eggs into a measuring jug, then add enough milk to make the total liquid 300ml (10fl oz). Set aside about 2 tablespoons of this mixture for glazing the tops later.
- Form the dough: Make a well in the center of the dry ingredients and pour in most of the egg and milk mixture. Using a rounded knife, gently mix until a soft, slightly sticky dough forms. Add the remaining liquid if needed to gather any dry crumbs from the bottom of the bowl.
- Shape and cut the scones: Turn the dough out onto a lightly floured surface. Knead very gently just a few times until it comes together. Pat or lightly roll the dough to a thickness of about 2cm (¾ inch).
- Cut out the scones: Using a 5cm (2 inch) fluted cutter dipped in flour, press straight down into the dough. Do not twist the cutter. Place the cut scones on the prepared baking sheets. Gently gather the scraps, re-roll, and cut out more scones.
- Glaze and bake: Brush the tops of the scones (being careful not to let it drip down the sides) with the reserved egg and milk mixture. Bake for 12–15 minutes, or until well-risen and a pale golden-brown. Transfer to a wire rack to cool.

Recipe Tips
- How to get light, fluffy scones: The absolute key is to handle the dough as little as possible. Overworking it develops gluten, which will make the scones tough. A soft, slightly sticky dough is what you’re aiming for.
- How to ensure a good, even rise: When you use your cutter, press it straight down into the dough and lift it straight up. Twisting the cutter seals the edges of the scone and prevents it from rising properly.
- Why use cold butter? Using cold butter that is rubbed into the flour creates small pockets of fat. In the hot oven, these melt and release steam, which is what creates the scones’ light, flaky layers.
- Can I make them ahead? Scones are always at their very best eaten fresh and warm on the day they are baked. However, you can refresh day-old scones by warming them in a low oven for about 5 minutes.
What To Serve With Plain Scones
Plain scones are the perfect canvas for the classic British cream tea. They are traditionally served warm, split in half, and topped with:
- Good quality strawberry or raspberry jam
- Clotted cream
- A simple spread of salted butter
The great debate is whether to follow the Devon method (cream first, then jam) or the Cornish method (jam first, then cream). Mary Berry herself sides with the Cornish tradition!
How To Store Plain Scones
Room Temperature: Store cooled scones in an airtight container at room temperature. They are best eaten within 2 days. Freeze: You can freeze the baked and cooled scones. Wrap them well and place them in a freezer-safe bag for up to 3 months. Thaw at room temperature or reheat gently in the oven from frozen.
Mary Berry Plain Scones Nutrition Facts
- Calories: 210kcal
- Carbohydrates: 32g
- Protein: 5g
- Fat: 7g
- Saturated Fat: 4g
- Sodium: 220mg
- Fiber: 1g
- Sugar: 5g
Nutrition information is estimated per scone and does not include toppings like jam or cream.
FAQs
This is almost always caused by overworking the dough or rolling it too thinly. Handle the dough very gently and ensure it’s at least 2cm (¾ inch) thick before cutting. Using warm butter can also cause the scones to spread rather than rise.
Yes, but you will need to add more baking powder. For this recipe, use 450g of plain (all-purpose) flour and increase the total baking powder to about 6 level teaspoons.
Yes. You can use the rim of a floured glass or simply cut the dough into wedges or squares with a sharp knife.

Mary Berry Plain Scones Recipe
Description
The quintessential recipe for classic British scones that are light, fluffy, and the perfect vehicle for jam and clotted cream.
Ingredients
Instructions
- Preheat oven to 220°C (200°C Fan). Grease two baking trays.
- Rub the cold butter into the sifted flour and baking powder until it resembles fine breadcrumbs. Stir in the sugar.
- Beat the eggs with enough milk to make 300ml of liquid. Add most of this to the dry ingredients, reserving some for a glaze.
- Gently mix with a knife to form a soft, slightly sticky dough.
- On a floured surface, pat the dough to 2cm thick. Cut out scones with a 5cm cutter, without twisting.
- Place on baking trays, brush the tops with the reserved egg wash, and bake for 12-15 minutes until golden.
- Cool on a wire rack, covered with a tea towel to keep them soft.
Notes
- Handle the dough as little as possible to keep the scones light and tender.
- Using cold butter is essential for achieving a flaky texture.
- For an authentic cream tea, serve the scones warm with clotted cream and strawberry jam.
- Scones are best enjoyed fresh on the day of baking.